Creating an IFC model
We’re going to create a new native IFC model from scratch, starting from a single shape, up to a simple building.
A BIM model is not just a 3D format. This means that you cannot just load any 3D model, and press a “Save as IFC” button. In fact, 3D is optional and you can have a large IFC model storing work schedules, cost rates, asset registers and more, and absolutely no 3D geometry at all.
However, in these tutorials, we will focus on basic 3D geometry. At a minimum, you will need to categorise your 3D elements (such as “Wall”, “Column”, “Window”, etc), and give them a location (such as “Level 01” of a building).
Creating a single object
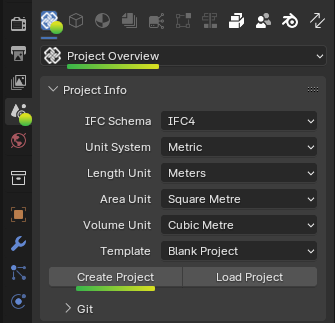
In the Properties panel on the right, ensure the icon for the Scene Properties tab is active showing the Project Overview. Click on Create Project to create a blank IFC project.
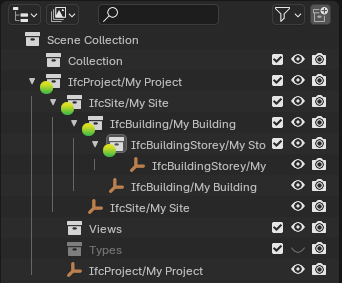
In the left Outliner panel, you will see a hierarchy of spaces that has been automatically created for you. This hierarchy is known is the Spatial Tree.
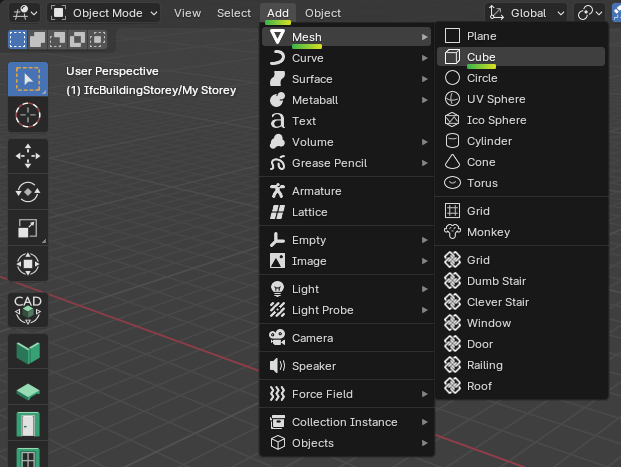
There are many ways to create objects. In practice, you should use an element type library, and we will see how to do this later. For now, we will only add a single element. In the Add menu, add a cube.
Any Blender object that you want to be part of IFC project must be converted into a IFC object by assigning a category. This category is known as the IFC Class.
See also
Use the IFC Class search tool to help choose an IFC Class!
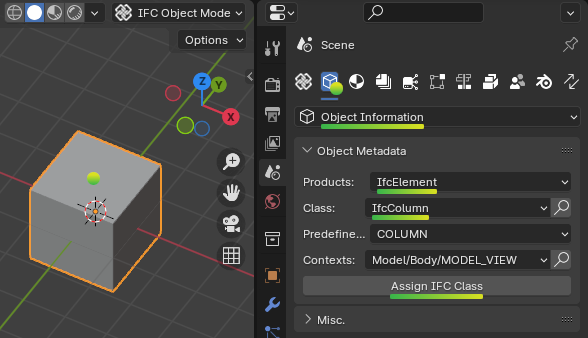
Select the cube (selected objects are highlighted in orange, careful not to select anything else!) and switch to the Object Information tab. Let’s pretend our Cube is a column, so select IfcElement from the Products dropdown, IfcColumn from the Class drop-down, and press Assign IFC Class.
Tip
There are no restrictions on which IFC Class you can choose regardless of the shape of your object. You can have a monkey-shaped wall if you want!
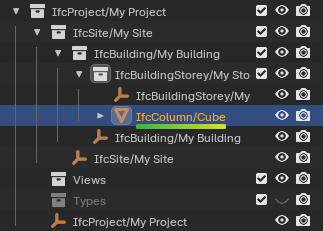
All IFC objects must also belong inside the Spatial Tree. In the Outliner panel, you will see that your newly created IfcColumn/Cube has been automatically placed in IfcBuildingStorey/My Storey.
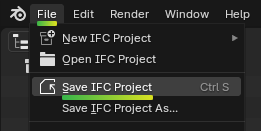
In the top left File menu, Save your new IFC model on your computer.
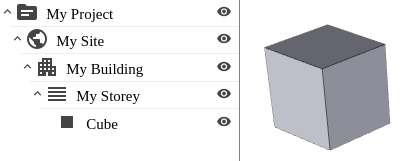
Congratulations! You have now created your first OpenBIM model from Blender! You can open the IFC file in any other program, and you will see something similar to the image below. Three simple open source online viewers you can test with are IfcPipeline, ThatOpenEditor, and 3DViewer.
Placing occurrences of an element type
TODO
Changing the locations of elements
TODO
Modeling a simple building
TODO